How to Automate and provision highly available web stack in AWS using Terraform


In this article we will see you how we can automate the cloud infrastructure using Terraform. In my previous article I have shown you how to setup web stack in aws using managed services like Elastic Beanstalk, Amazon MQ, Elastic Cache and RDS services. Although it was fun but the process has some issues, lets discuss those one by one
1.Complex process: When we have heavy usage of cloud services in an organisation then there will be regular provisioning requests, regular changes and regular deployments and we will run into many problems when setting up the infrastructure manually. Setting up infrastructure in first place itself is a complex process, as we have to plan and take care of so many things like network, OS, storage, load balancers, etc.
2. Not repeatable: Although it might sound easy to setup the infrastructure manually for the first time but doing same thing multiple times is time consuming and not an ideal approach. Suppose if we want to replicate the same structure for dev, staging environment then doing it manually isn’t fun and this isn’t something any individual or organization would be aiming for.
3. Difficult to track and not centralised: In manual approach it would difficult to track as to who made the changes, when the changes were made in the infrastructure, and in order to track that we have to maintain the documents of the infrastructure like an inventory and it’s a time consuming process.
4. Error prone Infrastructure: There will be huge chances of human error during the manual setup and this might to lead to non-functional infrastructure, bugs or exposed infrastructure.
Solution to our problems:
1.Automatic Setup: We need everything to be automated so there is less chance of making human error.
2.Version control: We need infrastructure in the form of code i.e. infrastructure as code (IAC) so that we can version control it.
3.State of infrastructure: Not only we need IAC but we also need the state of infrastructure, So that we can maintain the state in centralised place.
4.Repeatable and Reusable: IAC should be repeatable for different environments instead of hardcoding the values.
Not only cloud automation solves the above problems but it adds lots of business values, like revenue growth, low operation costs, more innovative (as when we automate infrastructure it saves lot of time and teams can invest that time to become more innovative) and more agile. So, we will be using terraform to perform cloud automation.
Terraform is one of the leading automation tool in the market and its open source. It is a tool for building, changing, and versioning infrastructure safely and efficiently. Terraform can manage existing and popular service providers as well as custom in-house solutions.
State: Terraform must store state about our managed infrastructure and configuration. This state is used by Terraform to map real world resources to our configuration, keep track of metadata, and to improve performance for large infrastructures. This state is stored by default in a local file named "terraform.tfstate", but it can also be stored remotely, which works better in a team environment.
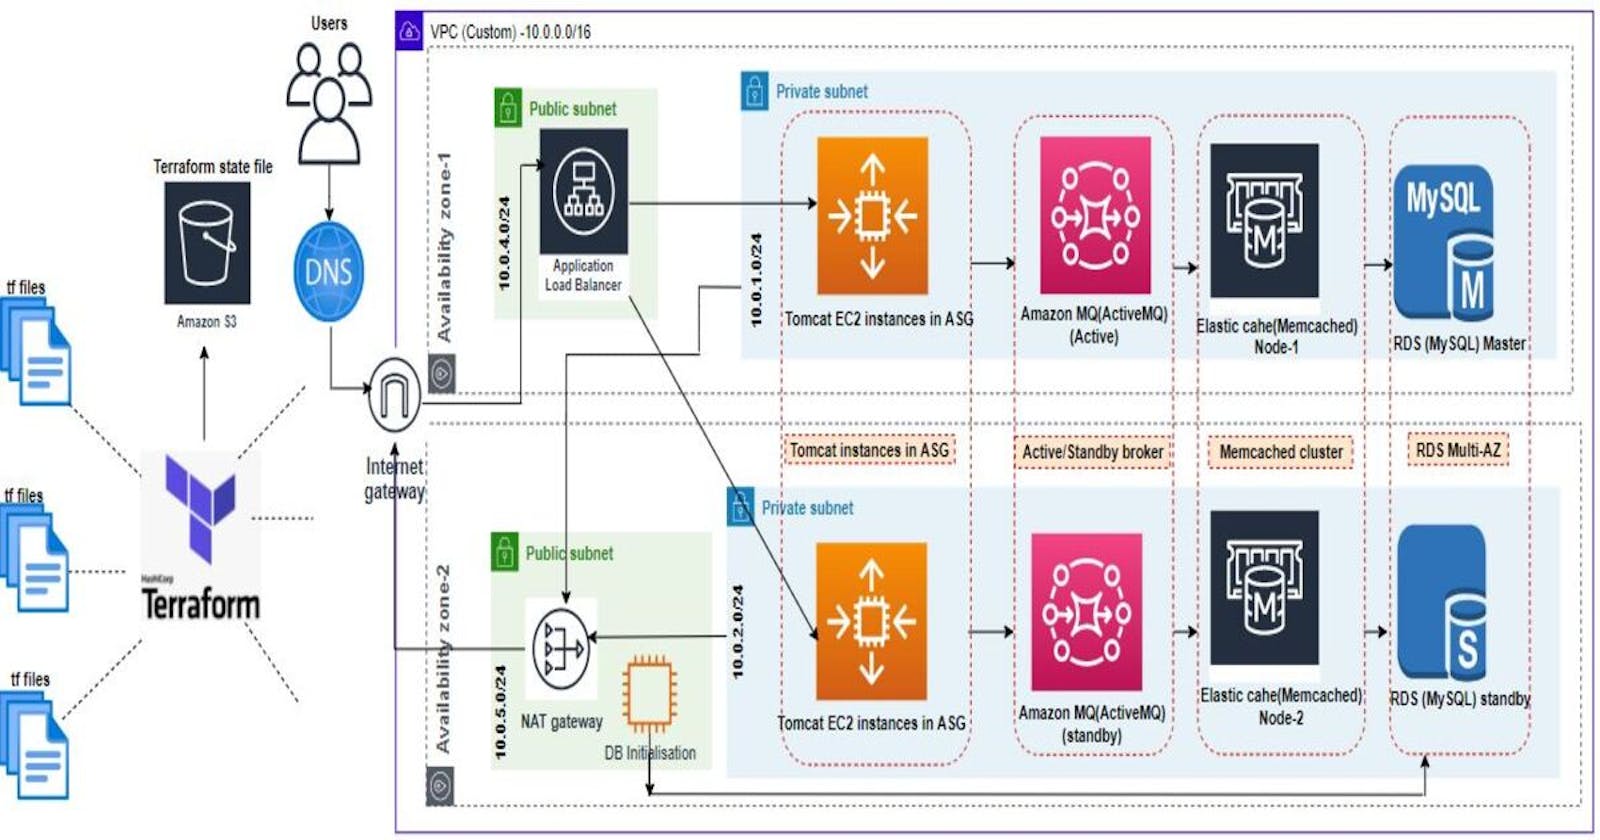
So, using terraform we are going to setup web stack on aws, not only we are going to setup the infrastructure but we will also maintain the state of infrastructure

Steps involved in the setup:
- Configure Terraform state for our infrastructure on amazon s3
- Define variables, providers file and create keypair to login to db initialisation instance.
- Setup VPC using Terraform modules.
- Define security groups for db initialisation instance, Frontend and Backend services.
- Define Backend services.
- Define Frontend services.
- Define db initialisation instance in public subnet and using remote-exec initialise RDS with our application db schema.
- Finally run Terraform Apply to set the infrastructure in aws
- Update our source code application properties file with backend services endpoints and then upload our application build artifact into Beanstalk environment to get our application working.
Prerequisites:
- Terraform installed on your local machine.
- An AWS account and AWS CLI is configured with secrete & access keys on your local machine.
- JDK8 installed on your local machine
- Maven installed on your local machine
1. Configure Terraform state for our infrastructure on amazon s3:
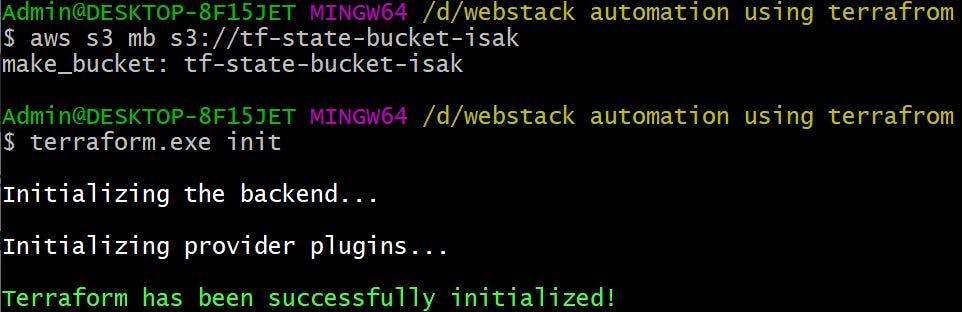
We will first configure Terraform state for our infrastructure on s3 using 'terraform' block as shown below (please create a bucket called 'tf-state-bucket-isak' in advance, Terraform state will be written to the key 'terraform/backend.tfstate' in the bucket)
terraform {
  backend "s3" {
    bucket = "tf-state-bucket-isak"
    key    = "terraform/backend.tfstate"
    region = "eu-west-2"
  }
}
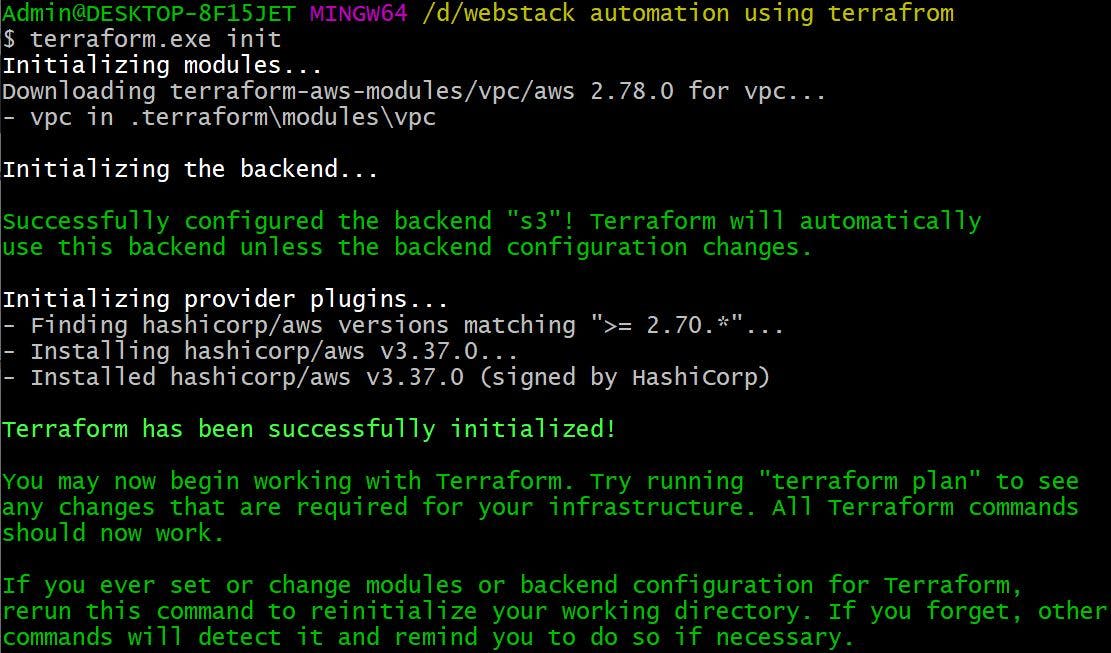
Then run terraform init, this will initialise the backend and configure s3 as backend to store terraform state.
2. Define variables, providers file and create keypair to login to bastion host
We will be defining the variables required of our setup like aws region, Availability Zones(AZs), VPC CIDR, public & private subnets CIDR, ami for the bastion host, key to ssh into bastion host, RabbitMQ user, password, dbuser, dbpassword, dbname, etc.
variable "REGION" {
  default = "eu-west-2"
}
variable "AMIS" {
  type = map
  default = {
    eu-west-1 = "ami-096cb92bb3580c758"
    eu-west-2 = "ami-0244a5621d426859b"
    eu-west-3 = "ami-096cb92bb3580c750"
  }
}

variable "PRIVATE_KEY_PATH" {
  default = "terraformstack"
}

variable "PUBLIC_KEY_PATH" {
  default = "terraformstack.pub"
}

variable "USERNAME" {
  default = "ubuntu"
}

variable "MYIP" {
  default = "51.9.138.70/32"
}

variable "rmquser" {
  default = "isak"
}

variable "rmqpass" {
  default = "terraformstack@123"
}

variable "dbuser" {
  default = "admin"
}

variable "dbpasswd" {
  default = "admin123"
}

variable "dbname" {
  default = "accounts"
}

variable "instance_count" {
  default = "1"
}
variable "VPC_NAME" {
  default = "web-vpc"
}

variable "AZ_1" {
  default = "eu-west-2a"
}

variable "AZ_2" {
  default = "eu-west-2b"
}

variable "AZ_3" {
  default = "eu-west-2c"
}

variable "VPC_CIDR" {
  default = "10.0.0.0/16"
}

variable "Private_Subnet_1" {
  default = "10.0.1.0/24"
}

variable "Private_Subnet_2" {
  default = "10.0.2.0/24"
}

variable "Private_Subnet_3" {
  default = "10.0.3.0/24"
}

variable "Public_Subnet_1" {
  default = "10.0.4.0/24"
}

variable "Public_Subnet_2" {
  default = "10.0.5.0/24"
}

variable "Public_Subnet_3" {
  default = "10.0.6.0/24"
}
Then define the provider block as shown below
provider "aws" {
  region = var.REGION
}
We will then create keypairs to login to bastion host using below resource block (please ensure private and public keys with name 'terraformstack' have been created on your local machine using ssh-keygen in same terraform folder, also note we are giving public key path as file not passing the key directly)
resource "aws_key_pair" "db_initialisation_keypair" {
  key_name   = "terraformstack"
  public_key = file(var.PUBLIC_KEY_PATH)
}
3. Setup VPC using terraform modules.
We will be setting up VPC i.e. 1x VPC, 3x public subnets, 3x private subnets, Route tables for public and private subnets, Internet gateway, NAT gateway in public subnet, public & private subnets association with public & private route tables using Terraform VPC module.
Terraform modules are small, reusable Terraform configurations that let us manage a group of related resources as if they were a single resource.
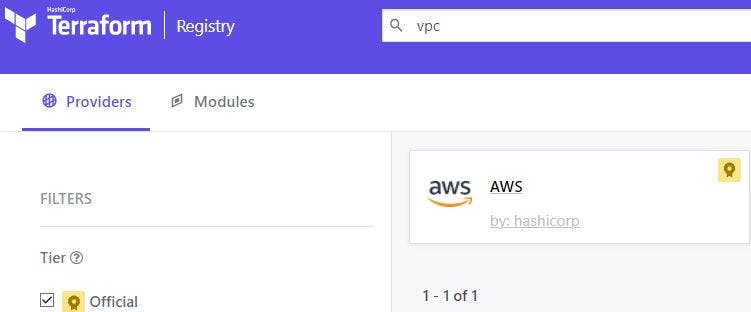
So go to registry.terraform.io and search for VPC, choose the official module.
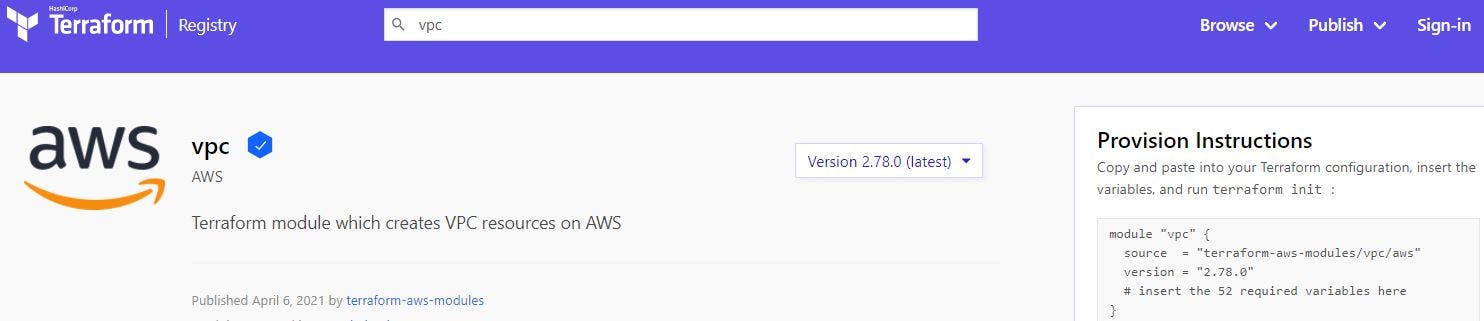 We will mention this module as source in our module block, then mention the required variables using variables defined in our variables tf file as shown below. Then when we run terraform init this will download the child VPC module and this child VPC module will be called by our root module (Every Terraform configuration has at least one module, known as its root module, which consists of the resources defined in the .tf files in the main working directory) to create all the required VPC components for our setup .
module "vpc" {
  source = "terraform-aws-modules/vpc/aws"

  name            = var.VPC_NAME
  cidr            = var.VPC_CIDR
  azs             = [var.AZ_1, var.AZ_2, var.AZ_3]
  private_subnets = [var.Private_Subnet_1, var.Private_Subnet_2, var.Private_Subnet_3]
  public_subnets  = [var.Public_Subnet_1, var.Public_Subnet_2, var.Public_Subnet_3]

  enable_nat_gateway = true
  single_nat_gateway = true

  enable_dns_hostnames = true
  enable_dns_support   = true

  tags = {
    Owner       = "Isak"
    Terraform   = "True"
    Environment = "dev"
  }

  vpc_tags = {
    Name = var.VPC_NAME
  }

}
If you notice we haven't mentioned internet gateway, public and private route table associations with public and private route table, etc, but this is taken care by the VPC module by default.
4.Define security groups for db initialisation instance, Frontend and Backend services:
Security Groups for Tomcat instances and ALB provisioned by Beanstalk: Elastic Beanstalk does create security groups automatically for ALB and Tomcat ec2 instances, but we don't want to come and update our backend security groups to whitelist that specific Tomcat ec2 security group created by Beanstalk. Rather we want to have a complete control, so we will create 2x security groups, one for Tomcat instances and other for ALB, and whitelist Tomcat ec2 security groups in backend security groups resource block in the same 'securitygroup' tf file so that tomcat instances can communicate with backend services.
Security Group for db initialisation: We will be using an ec2 instance with ubuntu 18.04 ami to initialise RDS with db schema required for our application and to SSH into Tomcat ec2 instances (although we don't really SSH into Tomcat ec2 instances but just in case if we need to troubleshoot any issues)
Security Group for Backend Services: In the backend we will have Amazon MQ, Elastic Cache, RDS. We want frontend tomcat instances to communicate with backend and also want all the backend services to interact with each other. We also want backend security group to allow db initialisation instance security group to initialise the RDS schema required for our application. For Tomcat instances to interact with backend services we create in-line security group with ingress & egress rules. To allow all backend services to interact with each other we will add an ingress rule to backend services group externally using 'aws_security_group_rule' resource block as shown below.
resource "aws_security_group" "beanstalk_alb_sg" {
  name        = "beanstalk_alb_sg"
  description = "Security Group for ALB provisioned by Elastic Beanstalk"
  vpc_id      = module.vpc.vpc_id

  egress {
    description = "Allow all outbound traffic"
    from_port   = 0
    to_port     = 0
    protocol    = "-1"
    cidr_blocks = ["0.0.0.0/0"]
  }

  ingress {
    description = "HTTP traffic"
    from_port   = 80
    to_port     = 80
    protocol    = "tcp"
    cidr_blocks = ["0.0.0.0/0"]
  }
}

resource "aws_security_group" "db_initialisation_sg" {
  name        = "db_initialisation_sg"
  description = "Security group for db_initialisation_instance so that we can ssh into it to initialise RDS "
  vpc_id      = module.vpc.vpc_id

  egress {
    description = "Allow all outbound traffic"
    from_port   = 0
    to_port     = 0
    protocol    = "-1"
    cidr_blocks = ["0.0.0.0/0"]
  }

  ingress {
    description = "Allow to ssh only from my ip"
    from_port   = 22
    to_port     = 22
    protocol    = "tcp"
    cidr_blocks = [var.MYIP]
  }
}

resource "aws_security_group" "beanstalk_tomcat_ec2_sg" {
  name        = "beanstalk_tomcat_ec2_sg"
  description = "Security group for tomcat ec2 instances provisioned by Elastic Beanstalk"
  vpc_id      = module.vpc.vpc_id

  egress {
    description = "Allow all outbound traffic"
    from_port   = 0
    to_port     = 0
    protocol    = "-1"
    cidr_blocks = ["0.0.0.0/0"]
  }

  ingress {
    description     = "Allow to ssh only from db_initialisation_instnace as our tomcat ec2 instances will be in private subnets"
    from_port       = 22
    to_port         = 22
    protocol        = "tcp"
    security_groups = [aws_security_group.db_initialisation_sg.id]
  }
}

resource "aws_security_group" "sg_for_backend_services" {
  name        = "sg_for_backend_services"
  description = "Security group for RDS, Elastic Cache, Amazon MQ"
  vpc_id      = module.vpc.vpc_id

  egress {
    description = "Allow all outbound traffic"
    from_port   = 0
    to_port     = 0
    protocol    = "-1"
    cidr_blocks = ["0.0.0.0/0"]
  }

  ingress {
    description     = "Allow frontend to interact with backend services"
    from_port       = 0
    to_port         = 0
    protocol        = "-1"
    security_groups = [aws_security_group.beanstalk_tomcat_ec2_sg.id]
  }

  ingress {
    description     = "Allow db_initialisation_instance to connect with rds instance to initialise db with schema"
    from_port       = 3306
    to_port         = 3306
    protocol        = "tcp"
    security_groups = [aws_security_group.db_initialisation_sg.id]
  }
}

resource "aws_security_group_rule" "allow_all_backend_services_to_interact_with_each_other" {
  description              = "Allow Amazon MQ, Elastic Cache, RDS to interact with each other"
  type                     = "ingress"
  from_port                = 0
  protocol                 = "tcp"
  to_port                  = 65535
  security_group_id        = aws_security_group.sg_for_backend_services.id
  source_security_group_id = aws_security_group.sg_for_backend_services.id
}
When we run terraform apply this will go ahead and create 4x security groups with in-line ingress & egress rules defined and also will add an ingress rule to backend services security group to allow all backend services to interact with each other.
5. Define Backend services:
First we will create the subnet groups for RDS and Elastic cache instances, because in this subnet groups RDS & Elastic cache instances will be launched. As we want the backend services to be in private subnets, we will make the group of private subnets for Elastic cache and RDS. Then we will define Multi-AZ MySQL RDS, with engine version 5.6.34, instance type as t2.micro. Similarly we define 2x node Memcached cluster and Active MQ in Active/Standby mode in private subnets across AZs.
resource "aws_db_subnet_group" "rds_private_subnet_group" {
  name       = "rds_private_subnet_group"
  subnet_ids = [module.vpc.private_subnets[0], module.vpc.private_subnets[1], module.vpc.private_subnets[2]]

  tags = {
    Name = "rds_private_subnet_group"
  }
}

resource "aws_elasticache_subnet_group" "memcached-subnet-group" {
  name       = "memcached-subnet-group"
  subnet_ids = [module.vpc.private_subnets[0], module.vpc.private_subnets[1], module.vpc.private_subnets[2]]
}

resource "aws_db_instance" "rds_mysql" {
  allocated_storage      = 20
  engine                 = "mysql"
  engine_version         = "5.6.34"
  instance_class         = "db.t2.micro"
  name                   = var.dbname
  username               = var.dbuser
  password               = var.dbpasswd
  parameter_group_name   = "default.mysql5.6"
  multi_az               = "true"
  publicly_accessible    = "false"
  skip_final_snapshot    = "true"
  db_subnet_group_name   = aws_db_subnet_group.rds_private_subnet_group.name
  vpc_security_group_ids = [aws_security_group.sg_for_backend_services.id]
}

resource "aws_elasticache_cluster" "memcached_cluster" {
  cluster_id                   = "memcached-cluster"
  engine                       = "memcached"
  node_type                    = "cache.t2.micro"
  num_cache_nodes              = 2
  parameter_group_name         = "default.memcached1.6"
  port                         = 11211
  security_group_ids           = [aws_security_group.sg_for_backend_services.id]
  subnet_group_name            = aws_elasticache_subnet_group.memcached-subnet-group.name
  az_mode                      = "cross-az"
  preferred_availability_zones = [var.AZ_1, var.AZ_2]
}

resource "aws_mq_broker" "active_mq" {
  broker_name        = "my-broker"
  engine_type        = "ActiveMQ"
  engine_version     = "5.15.0"
  host_instance_type = "mq.t2.micro"
  security_groups    = [aws_security_group.sg_for_backend_services.id]
  subnet_ids         = [module.vpc.private_subnets[0], module.vpc.private_subnets[1]]
  deployment_mode    = "ACTIVE_STANDBY_MULTI_AZ"

  user {
    username = var.rmquser
    password = var.rmqpass
  }
}
6. Define Frontend services:
We will be using Elastic Beanstalk to provision front end services i.e. Tomcat ec2 instances and ALB. So, we will deploy default application of Elastic Beanstalk and then we will get our environment ready for our application. Once environment is ready we will upload our build artifact as application v1.25 to deploy our custom application. So we will deploy default Elastic beanstalk application using Terraform resource block 'aws_elastic_beanstalk_application'.
'aws_elastic_beanstalk_application' resource creates an application that has one configuration template named default, and no application versions.
resource "aws_elastic_beanstalk_application" "web_application" {
  name        = "web_application"
}
Next we will create environment file where will be setting up environment for our web application using 'aws_elastic_beanstalk_environment' resource block and will define all the necessary settings like we need ALB, ALB in public subnets, stickiness session enabled, HTTPs settings, SSL certificate ARN to be downloaded from Amazon certificate Manager(ACM) for HTTPs encryption, Deployment policy, Batch size, Tomcat ec2 instances type, Autoscaling settings, security groups for ALB & Tomcat ec2 instances, etc. Terraform docs has the info for Beanstalk environment configuration settings but encourages to check the aws docs for complete Beanstalk environment configuration settings which is available at docs.aws.amazon.com/elasticbeanstalk/latest... We will implement all the necessary settings using setting block inside the Elastic Beanstalk resource block as shown below. Once we finished with the settings, we will add depends_on meta-argument to ensure that Elastic Beanstalk environment gets created after the security groups for Tomcat and ALB get created. So Beanstalk environment creation depends on security groups of Tomcat & ALB creation.
resource "aws_elastic_beanstalk_environment" "web-application-env" {
  name                = "web-application-env"
  application         = aws_elastic_beanstalk_application.web_application.name
  solution_stack_name = "64bit Amazon Linux 2 v4.1.7 running Tomcat 8.5 Corretto 11"
  cname_prefix        = "isak-mohammed-application"

  setting {
    namespace = "aws:ec2:vpc"
    name      = "VPCId"
    value     = module.vpc.vpc_id
  }

  setting {
    namespace = "aws:autoscaling:launchconfiguration"
    name      = "IamInstanceProfile"
    value     = "aws-elasticbeanstalk-ec2-role"
  }

  setting {
    namespace = "aws:ec2:vpc"
    name      = "AssociatePublicIpAddress"
    value     = "false"
  }

  setting {
    namespace = "aws:ec2:vpc"
    name      = "Subnets"
    value     = join(",", [module.vpc.private_subnets[0], module.vpc.private_subnets[1], module.vpc.private_subnets[2]])
  }

  setting {
    namespace = "aws:ec2:vpc"
    name      = "ELBSubnets"
    value     = join(",", [module.vpc.public_subnets[0], module.vpc.public_subnets[1], module.vpc.public_subnets[2]])
  }

  setting {
    namespace = "aws:autoscaling:launchconfiguration"
    name      = "InstanceType"
    value     = "t2.micro"
  }

  setting {
    namespace = "aws:autoscaling:launchconfiguration"
    name      = "EC2KeyName"
    value     = aws_key_pair.db_initialisation_keypair.key_name
  }

  setting {
    namespace = "aws:autoscaling:asg"
    name      = "Availability Zones"
    value     = "Any 3"
  }

  setting {
    namespace = "aws:autoscaling:asg"
    name      = "MinSize"
    value     = "2"
  }

  setting {
    namespace = "aws:autoscaling:asg"
    name      = "MaxSize"
    value     = "4"
  }

  setting {
    namespace = "aws:elasticbeanstalk:environment"
    name      = "LoadBalancerType"
    value     = "application"
  }


  setting {
    namespace = "aws:autoscaling:updatepolicy:rollingupdate"
    name      = "RollingUpdateEnabled"
    value     = "true"
  }

  setting {
    namespace = "aws:autoscaling:updatepolicy:rollingupdate"
    name      = "RollingUpdateType"
    value     = "Health"
  }

  setting {
    namespace = "aws:autoscaling:updatepolicy:rollingupdate"
    name      = "MaxBatchSize"
    value     = "1"
  }

  setting {
    namespace = "aws:elasticbeanstalk:environment:process:default"
    name      = "StickinessEnabled"
    value     = "true"
  }

  setting {
    namespace = "aws:elasticbeanstalk:environment:process:default"
    name      = "HealthCheckPath"
    value     = "/login"
  }


  setting {
    namespace = "aws:elbv2:listener:443"
    name      = "Protocol"
    value     = "HTTPS"
  }

  setting {
    namespace = "aws:elbv2:listener:443"
    name      = "SSLCertificateArns"
    value     = "arn:aws:acm:eu-west-2:702774876535:certificate/bf308691-b361-4d57-9f6e-9af3c49715a8"
  }

  setting {
    namespace = "aws:elasticbeanstalk:command"
    name      = "BatchSizeType"
    value     = "Fixed"
  }


  setting {
    namespace = "aws:elasticbeanstalk:command"
    name      = "BatchSize"
    value     = "1"
  }

  setting {
    namespace = "aws:elasticbeanstalk:command"
    name      = "DeploymentPolicy"
    value     = "Rolling"
  }

  setting {
    namespace = "aws:autoscaling:launchconfiguration"
    name      = "SecurityGroups"
    value     = aws_security_group.beanstalk_tomcat_ec2_sg.id
  }

  setting {
    namespace = "aws:elbv2:loadbalancer"
    name      = "SecurityGroups"
    value     = aws_security_group.beanstalk_alb_sg.id
  }

  depends_on = [aws_security_group.beanstalk_alb_sg, aws_security_group.beanstalk_tomcat_ec2_sg]


}
7. Define db initialisation instance in public subnet and using remote-exec initialise RDS with our application db schema
As per our architecture we will be launching a db initialisation instance in public subnet. The need of db initialisation instance in our Architecture serves 2x purposes, one is to connect to RDS and initialise the db schema required for our application and second to SSH into Tomcat instances in private subnets for troubleshooting in case of any issues. We will be defining db initialisation instance using 'aws_instance' resource block, we will be using Ubuntu 18.04 ami which is defined in variables file, instance type of t2.micro, we will be placing db initialisation instance in the 1st public subnet and security group we define earlier. (Please note its not good practice to use normal ami for initialising the rds instances or to connect with any resources in private subnets. We need to use security hardened ami from CIS (centre of internet security) to connect with resources in private subnets as this provide extra security features. I have used normal ami to just to keep things simple)
To initialise RDS with our application db schema through db initialisation instance we will be using a shell script which will run as soon as db initialisation instance is provisioned using Terraform 'remote-exec' provisioner. But for db initialisation instance to connect with RDS it needs RDS endpoint and we will pass the RDS endpoint to Bastion host by using Terraform 'templatefile' function.
Terraform templatefile reads the file at the given path and renders its content as a template using a supplied set of template variables.
So we will create template folder, define a template file in it which will run simple MySQL query on RDS to initialise it with our application db schema. We will pass rds-endpoint, dbuser, dbpassword as variables to templatefile function using 'file' provisioner block. Then terraform will interpolates those variables and construct the SQL query we want. Once the query is built, we will store it in destination folder as script and give it an execute permission and execute it along with other in-line commands of the remote-exec provisioner block as shown below.
Then we need to define the connection block to confirm how to establish connection with db initialisation instance, like user name (mentioned in variables file), Private Key and public Ip. Still there is one important bit here, which is, we want to provision our db initialisation instance only after RDS is provisioned and has valid rds-endpoint, so again we will use depends_on meta-argument to achieve this as shown below.
resource "aws_instance" "db_initialisation_instance" {
  ami                    = lookup(var.AMIS, var.REGION)
  instance_type          = "t2.micro"
  key_name               = aws_key_pair.db_initialisation_keypair.key_name
  subnet_id              = module.vpc.public_subnets[0]
  count                  = var.instance_count
  vpc_security_group_ids = [aws_security_group.db_initialisation_sg.id]

  tags = {
    "Name" = "db_initialisation"
  }

  provisioner "file" {
    content     = templatefile("templates/db-initialisation.tmpl", { rds-endpoint = aws_db_instance.rds_mysql.address, dbuser = var.dbuser, dbpass = var.dbpasswd })
    destination = "/tmp/db-init.sh"
  }

  provisioner "remote-exec" {
    inline = [
      "sudo apt update",
      "sudo apt install mysql-client-5.7 -y",
      "sudo chmod +x /tmp/db-init.sh",
      "sudo /tmp/db-init.sh"
    ]
  }

  connection {
    user        = var.USERNAME
    private_key = file(var.PRIVATE_KEY_PATH)
    host        = self.public_ip
  }

  depends_on = [aws_db_instance.rds_mysql]

}
8. Finally run Terraform Apply to set the infrastructure in aws:
We have defined all the services required for our infrastructure in tf files. Once we are happy we will run Terraform init to download the providers plugins and any modules defined in our code. Terraform init will also configure our infrastructure state file to be stored in S3.
Once providers plugins are downloaded we will run Terraform validate to check any syntax errors. we can see there are no errors.

Then we will run Terraform plan to see what services will be provisioned and we can see its showing as 34 resources will be provisioned.


We will finally run Terraform apply for terraform to go and provision the resources

Terraform will ask for your confirmation before it can provision
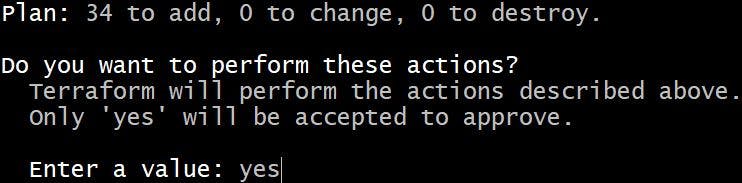
Once we authorise, Terraform will go and create our required infrastructure

9. Update our source code application properties file with backend services endpoints and then upload our application build artifact into Beanstalk environment to get our application working:
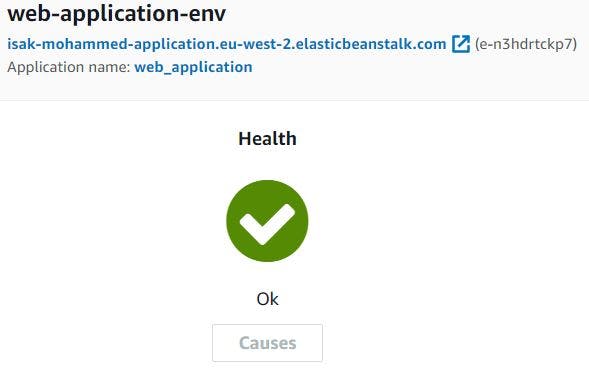
It nearly took 16xminutes for Terraform to provision infrastructure we want (Please note our Elastic Beanstalk environment health will be transitioned to severe as we have changed the environment settings of default Elastic Beanstalk application, so that we can upload our custom application artifact. But as soon as we upload our custom artifact environment health should transitioned to healthy).
We will copy the endpoints of all the backend services (RDS, Memcached and ActiveMQ) and update them in our application source code. Then we will build the artifact using maven and upload the .war file in Beanstalk environment as web-applicatonv1.25 to access our custom application.

Our Application environment will be transitioned to healthy and we can access our application with Elastic Beanstalk environment endpoint.
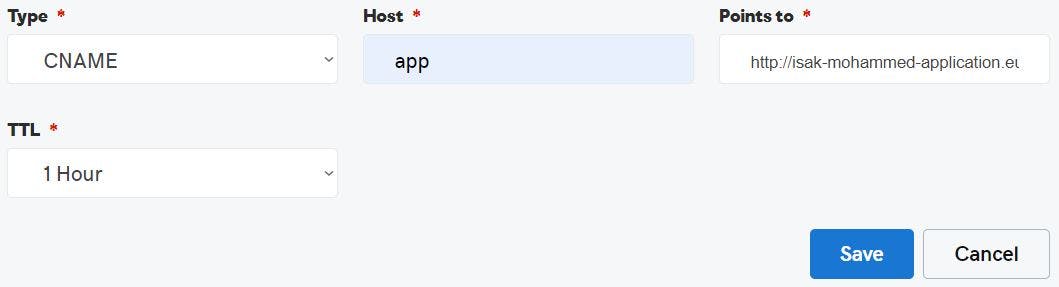
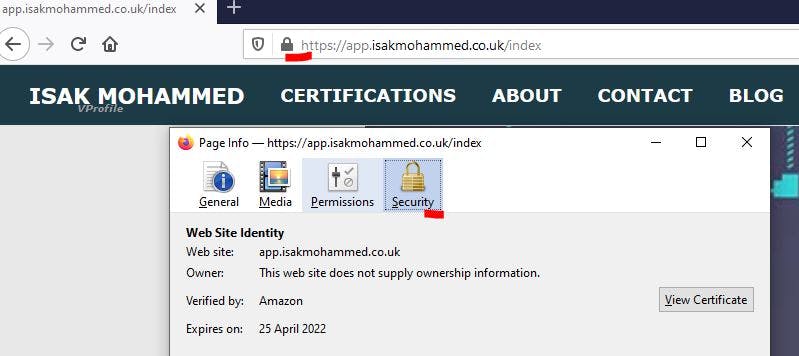
But we don't want users to use the Elastic Beanstalk environment endpoint to access our application rather we want them to use something easy so that they can remember URL name. So, we will copy Elastic Beanstalk environment end point and add it as CNAME in the domain provider dns setting to divert the traffic to Elastic Beanstalk environment endpoint once the users hit URL app.isakmohammed.co.uk.
So, Successfully we were able to provision the whole infrastructure within 16xminutes and have a running application within minutes.